How to Arrange Flowers Like a Florist: Step-by-Step for Every Skill Level
18 min readContents:
- Why Most Home Arrangements Fall Short (And What Florists Know)
- Tools You Actually Need to Arrange Flowers Like a Florist
- The Non-Negotiables
- Helpful but Not Essential
- Budget Breakdown for a Starter Kit
- Conditioning: The Step Most Hobbyists Skip Entirely
- How to Condition Cut Flowers Properly
- Special Handling for Specific Stem Types
- Understanding Floral Design Principles: The Framework Behind Every Great Arrangement
- The Five Design Principles
- Color Theory for Flower Arranging
- The Three-Layer Method: How Florists Build an Arrangement
- Layer 1: Establish the Framework with Foliage and Line Flowers
- Layer 2: Place Your Focal Flowers
- Layer 3: Add Secondary Blooms and Texture Fillers
- A Reader Story: From “Grocery Store Grab” to Genuine Centerpiece
- Step-by-Step: Three Arrangement Styles for Different Skill Levels
- Beginner: The Hand-Tied Bouquet
- Intermediate: The Grid-Vase Arrangement
- Advanced: The Foam-Based Centerpiece
- Flower Selection: Matching Blooms to Seasons and Skill Level
- US Seasonal Availability Guide
- Flowers That Forgive Beginner Mistakes
- Flowers That Demand More Attention
- Pro Tips for Extending Vase Life
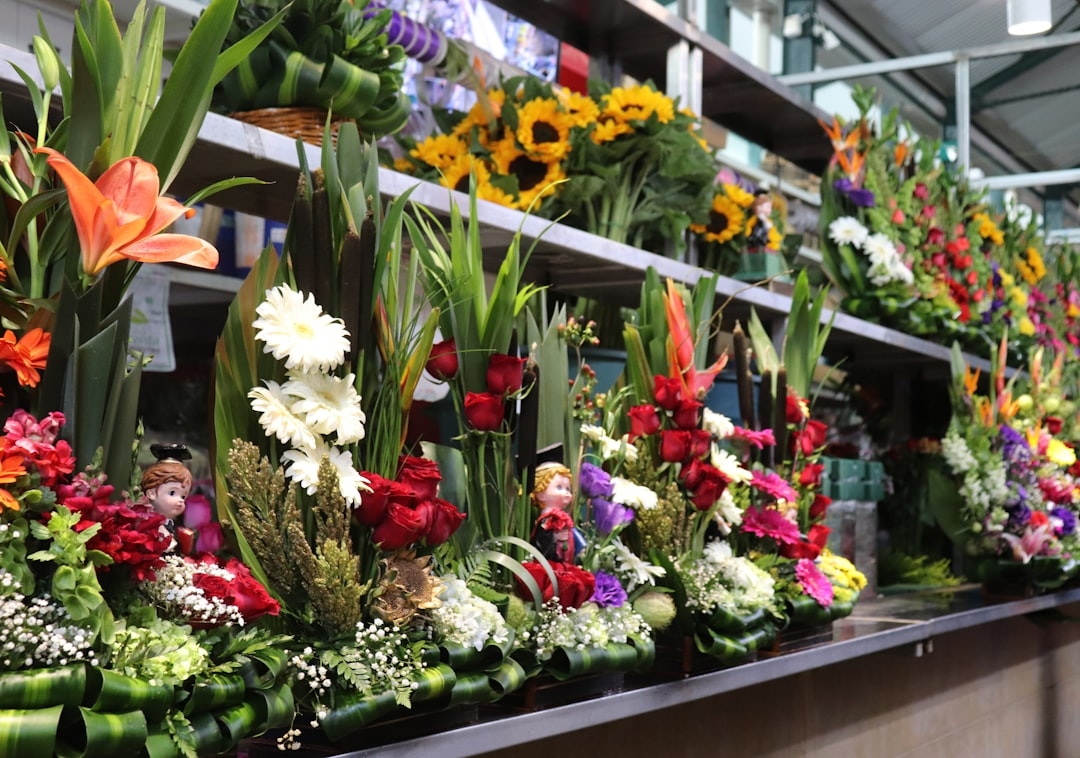
- Sourcing Flowers: Where to Buy and What to Look For
- Sourcing Options by Priority
- Frequently Asked Questions
- How do you arrange flowers like a florist at home without expensive tools?
- What is the most important step in flower arranging that beginners skip?
- How do florists keep flower arrangements fresh so long?
- What flowers are easiest to arrange for beginners?
- How many flowers do you need for a full-looking arrangement?
- Building a Practice Habit: How to Actually Get Better
Here’s a misconception worth correcting immediately: professional florists don’t arrange flowers like a florist by relying on some inherited artistic gift. They follow a system. A repeatable, learnable set of mechanics that governs proportion, stem prep, color theory, and structural hierarchy. The “talent” you admire in a florist’s window is largely technique — and technique can be taught.
Most hobbyist gardeners approach a vase the same way they approach a puzzle: grab the prettiest pieces first and try to make them fit. The result looks crowded on one side, sparse on the other, and wilted within two days. That’s not a creativity problem. It’s a process problem.
This guide breaks down the florist’s process from the ground up. We’ll cover the biology behind why stems behave the way they do, the tools that actually matter (and what you can skip), color and proportion frameworks used by working professionals, and step-by-step construction methods for three different arrangement styles. Whether you’re working with garden-cut dahlias in August or a grocery store bouquet in February, the same principles apply.
Why Most Home Arrangements Fall Short (And What Florists Know)
Professional florists train for months — often years — before they arrange flowers independently in a shop setting. That training isn’t primarily about aesthetics. It’s about biology, mechanics, and conditioning. Understanding what’s happening inside a cut stem changes everything about how you handle it.
When a flower stem is cut, it begins drawing water through the xylem — the vascular tissue that runs the length of the stem. Within minutes of exposure to air, that cut surface starts sealing over with sap and air embolisms, blocking uptake. A flower that looks fine at purchase may already be dehydrated at the cellular level. Florists counter this by re-cutting stems immediately before placing them in water, removing that blocked section and restoring full uptake.
Foliage submerged below the waterline is another major difference between amateur and professional results. Submerged leaves decompose rapidly, releasing bacteria that clog the xylem and cloud the water. A professional strips every leaf below the waterline as a matter of routine, not aesthetics.
Temperature matters too. Florists store most cut flowers at 34–38°F (1–3°C) — just above freezing. At home, room-temperature water and a warm kitchen counter dramatically accelerate respiration and ethylene production, shortening vase life by three to five days compared to cool conditions.
Tools You Actually Need to Arrange Flowers Like a Florist
The professional toolkit is surprisingly minimal. You don’t need a design studio or a $400 floral knife. You do need a small set of specific items used correctly.
The Non-Negotiables
- Floral snips or a sharp bypass pruner: Avoid scissors with serrated blades — they crush vascular tissue rather than cutting cleanly. A good pair of Japanese stainless steel floral snips runs $15–$30 and will last years with proper cleaning.
- A clean bucket or vase: Bacteria from previous arrangements linger in scratches and crevices. Wash with a 10% bleach solution between uses, then rinse thoroughly.
- Floral preservative: Commercial packets contain three components — sugar (fuel for the bloom), acidifier (to lower pH and improve water uptake), and a biocide (to suppress bacterial growth). Studies from the Society of American Florists show preservatives extend vase life by an average of 25–40% compared to plain water.
- Waterproof floral tape: Used in a grid pattern across the vase opening to control stem angles. Clear tape disappears visually; green tape blends with foliage.
- Floral foam (optional): Oasis-brand foam is a go-to for structured arrangements like centerpieces. Soak for 60–90 seconds — never push it underwater to force saturation, which traps air pockets inside.
Helpful but Not Essential
- Chicken wire: An excellent sustainable alternative to floral foam. Crumple a sheet loosely into a ball and place it inside your container. It supports stems without single-use plastic.
- Flower frog (kenzan): A heavy metal pin holder used in Ikebana and increasingly in Western arrangements. Particularly useful for thick-stemmed flowers like sunflowers or peonies in shallow dishes.
- Stem stripper: A tool with graduated holes that strips thorns and leaves in a single pull. Useful for high-volume work, but a thumb and forefinger work fine for home arrangements.
Budget Breakdown for a Starter Kit
You can assemble a functional florist-level toolkit for under $60:
- Japanese floral snips: $18–$28
- Waterproof floral tape (2 rolls): $4–$6
- Floral preservative packets (100-count box): $8–$12
- 1–2 clean glass vases (secondhand or new): $5–$15
- Small bucket for conditioning: often free (repurpose a kitchen bucket)
Total investment: roughly $35–$61. Compare that to a single professionally arranged bouquet, which averages $65–$150 at a retail florist in most US cities.
Conditioning: The Step Most Hobbyists Skip Entirely
Conditioning is the 12–24 hour process of preparing cut stems before they go into a finished arrangement. It is, without exaggeration, the single highest-impact thing you can do to extend vase life and improve bloom appearance. Most home arrangers skip it entirely because they’re excited to get flowers into a vase immediately. That impatience costs days of vase life.
How to Condition Cut Flowers Properly
- Re-cut all stems: Use your sharp snips to remove at least ½ inch (1.25 cm) from each stem at a 45-degree angle. The angled cut increases surface area for water uptake and prevents the stem from sitting flat against the vase bottom, which would block the cut end.
- Strip foliage below the waterline: Remove any leaves, buds, or side shoots that would be submerged. This takes 30 seconds per stem and prevents bacterial bloom in the water.
- Place in cool, deep water with preservative: The deeper the water, the more stem surface is available for uptake. Fill your conditioning bucket at least 6–8 inches deep.
- Allow to rest in a cool, dark location: A cool basement, garage, or lower shelf in the refrigerator works well. Avoid storing near fruit — ripening apples and pears produce high levels of ethylene gas, which accelerates petal drop and wilting.
- Wait 12–24 hours before arranging: Fully conditioned flowers are hydrated, firm, and will hold their structure in an arrangement far better than flowers placed directly from the store.
Special Handling for Specific Stem Types
Not every stem behaves the same way. Woody stems — like lilac, hydrangea, and viburnum — benefit from having the bottom inch split vertically with pruning shears, or lightly crushed with a hammer, to increase water uptake surface. Hollow-stemmed flowers such as delphiniums and amaryllis can be turned upside down, filled with water, and plugged with a small piece of cotton before being placed right-side-up — a technique that prevents the hollow interior from drying out. Milky-stemmed flowers like euphorbias and poppies exude a latex sap when cut; searing the cut end over a flame for 5–10 seconds seals the sap without blocking water uptake.
Understanding Floral Design Principles: The Framework Behind Every Great Arrangement
Florists don’t arrange by feel alone. They apply a design framework — typically built on five classical principles — that produces consistent, professional results regardless of flower type or container. Learning this framework is what separates a hobbyist who sometimes gets lucky from one who reliably produces beautiful work.
The Five Design Principles
1. Proportion. The arrangement should be 1.5 to 2 times the height or width of its container. A 10-inch vase calls for flowers that reach 15–20 inches at their tallest. Proportions that fall outside this ratio tend to look either squat and heavy or spindly and unstable.
2. Balance. Arrangements can be symmetrical (mirror-image on both sides, classic and formal) or asymmetrical (visual weight distributed unevenly, more dynamic and naturalistic). Asymmetrical arrangements are more common in contemporary floristry. The rule: heavier-looking blooms and darker colors carry more visual weight and should anchor the lower and center portions of the design.
3. Focal Point. Every arrangement needs a visual anchor — typically one to three large, prominent blooms placed at the center or slightly off-center of the design. The eye needs somewhere to land. Without a focal point, arrangements read as busy and unsettled.
4. Texture and Rhythm. Varied textures — smooth petals against feathery fillers, round forms against spiky ones — create visual interest. Rhythm is achieved by repeating a color, form, or texture at intervals throughout the arrangement so the eye moves naturally from point to point.
5. Scale. Flower heads, container size, and the space the arrangement occupies should all relate to each other in scale. A single dinner-plate dahlia in a narrow bud vase is a scale mismatch. Match bloom size to container proportions and to the surface where the arrangement will live.
Color Theory for Flower Arranging
Color is where many hobbyists freeze up, defaulting to “whatever looks pretty together” and hoping for the best. Professional florists use three reliable color schemes:
- Monochromatic: Various tints, tones, and shades of a single hue. An all-white arrangement with cream, ivory, and pale blush reads as sophisticated and cohesive. Easiest to execute and hardest to get wrong.
- Analogous: Colors adjacent to each other on the color wheel — orange, peach, and yellow, or purple, blue, and violet. Produces a harmonious, naturalistic feel that works well for garden-style arrangements.
- Complementary: Colors opposite on the color wheel — purple and yellow (think irises with sunflowers), or orange and blue (marigolds with delphiniums). Creates the most visual contrast and energy. Use complementary schemes in odd-numbered ratios — 70% one color, 30% the complement — to avoid a jarring 50/50 split.
The Three-Layer Method: How Florists Build an Arrangement
The clearest framework for constructing a professional-looking arrangement is the three-layer method. This is not a formal industry term, but it describes a near-universal construction sequence used by working florists: establish structure, add focal blooms, fill in texture.
Layer 1: Establish the Framework with Foliage and Line Flowers
Before a single focal bloom goes in, florists establish the skeleton of the arrangement using foliage and line flowers — tall, vertically oriented stems that define the height and outline of the design. Eucalyptus, Italian ruscus, salal, and pittosporum are common foliage choices. Line flowers include gladiolus, liatris, snapdragons, and stock.
Place your tallest line elements first, positioning them at the back or center (depending on whether the arrangement will be viewed from one side or all around). These stems should reach 1.5 to 2 times the container height. Add foliage to fill in the outline, covering the mechanics (tape grid, foam, or chicken wire) while leaving openings for focal stems to follow.
Layer 2: Place Your Focal Flowers
Focal flowers are the visual stars — roses, peonies, dahlias, sunflowers, lilies. These are the largest, most prominent blooms, and they go in second, after the framework is established. Work in odd numbers: three, five, or seven focal blooms create more natural-looking groupings than even numbers.
Place focal flowers at varying heights, not all at the same level. A common beginner mistake is creating a flat “ceiling” where all flower heads align at one plane. Vary heights by 2–4 inches between focal blooms to create depth. Position the largest bloom slightly off-center and lower — this creates a visual anchor and draws the eye inward.
Layer 3: Add Secondary Blooms and Texture Fillers
Secondary blooms (spray roses, lisianthus, cosmos, ranunculus) and texture fillers (baby’s breath, waxflower, Queen Anne’s lace, eryngium, amaranthus) complete the arrangement by filling visual gaps, adding texture contrast, and softening the overall silhouette. These elements should nestle between the focal blooms rather than sitting on top of them.
A good rule: if you can see the mechanics from the front, you need more filler. If the arrangement looks so packed that no single bloom stands out, remove some filler. The goal is flowers that appear to float — supported but not crowded.
A Reader Story: From “Grocery Store Grab” to Genuine Centerpiece
A gardener in Portland, Oregon shared a frustration many of us recognize: she’d been growing dahlias for three seasons, cutting gorgeous blooms in late August, and every arrangement she made looked “like I just shoved them in a bucket.” The stems flopped. The colors felt muddy. Within two days, petals dropped.
The problems, once identified, were entirely fixable. She was cutting dahlias in the afternoon heat (dahlias should be cut in the early morning or evening when stem pressure is highest), she wasn’t conditioning them overnight, and she was placing large dinner-plate varieties alongside small spray dahlias of similar colors — creating a scale mismatch with no clear focal point. She also skipped the tape grid, so stems migrated and leaned.
The fix took one season of practice. She started cutting before 7 a.m., conditioning overnight in a cool garage, using a tape grid across a wide-mouthed mason jar, and separating dinner-plate blooms (focal) from café au lait and small ball varieties (secondary). The results were, by her own description, “genuinely unrecognizable.” Same garden, same flowers, completely different outcomes. The difference was entirely process.
Step-by-Step: Three Arrangement Styles for Different Skill Levels
Beginner: The Hand-Tied Bouquet
The hand-tied bouquet is the most fundamental arrangement form in Western floristry. It requires no container mechanics beyond a vase — just your hands and a ribbon or twine to bind the stems.
- Condition your flowers overnight as described above.
- Select 5–7 stems of varying types: 2–3 focal flowers, 2 secondary blooms, 1–2 foliage or filler stems.
- Hold your first focal flower loosely in your non-dominant hand. Add stems one at a time, rotating the bouquet slightly with each addition (about 20–30 degrees per stem). This creates the classic spiral stem pattern that allows the bouquet to stand independently in a vase.
- Keep all stems angled in the same rotational direction — never cross stems, which creates a flat, messy base.
- When all stems are placed, hold the bouquet at the binding point (roughly where you’ve been gripping it) and tie firmly with twine or a rubber band.
- Trim all stems to an equal length — roughly 6–8 inches below the binding point — using one clean cut.
- Place in a clean vase with fresh preservative water, with the binding point just at or below the vase rim.
Intermediate: The Grid-Vase Arrangement
This technique uses a tape grid across a vase opening to hold stems in place, allowing far more control over angles and spacing than a hand-tied bouquet.
- Clean your vase and create a grid by running parallel strips of waterproof floral tape across the opening, then layering perpendicular strips. Aim for squares roughly 1.5–2 inches across. The tape should adhere firmly to the dry rim — apply tape before adding water.
- Fill the vase ¾ full with preservative water.
- Establish your framework: add foliage stems first, using the grid cells to control their angles. Build height at the center and back, lower volume toward the front.
- Add focal blooms through the grid cells, varying heights and angles. Use the grid deliberately — place tall focal stems in the center cells, angled stems toward the outer cells.
- Fill in with secondary blooms and texture fillers, checking from the front, sides, and slightly above as you work.
- Re-cut and add any remaining stems, adjusting through the grid as needed.
Advanced: The Foam-Based Centerpiece
Foam-based arrangements allow three-dimensional construction impossible with a vase alone — stems can be inserted at any angle, including horizontal and downward-facing, which creates the lush, domed look of a professional table centerpiece.
- Select a low, wide container — a compote, a wooden box, or a ceramic bowl works well. Line non-waterproof containers with plastic sheeting.
- Soak a block of floral foam for 60–90 seconds until it sinks and stops releasing bubbles. Do not force it under water. Trim to fit the container, leaving the foam about ½ inch above the container rim — this allows you to insert stems at downward angles over the edge.
- Secure the foam with a strip of waterproof tape across the top, anchored to the container edges.
- Establish the outline with foliage, inserting stems at consistent angles around the perimeter to create a collar. Then add taller foliage at the center to define height.
- Insert focal blooms, working from the center outward. Vary stem lengths — typically 4–6 inches of stem inside the foam — and insert at angles that point outward and slightly downward toward the perimeter.
- Fill gaps with secondary blooms and fillers. Check coverage from all sides and from above.
- Add water to the foam daily — foam dries out faster than you’d expect, especially in warm rooms. A squeeze bottle with a narrow tip allows you to add water without disturbing the arrangement.
Flower Selection: Matching Blooms to Seasons and Skill Level
Working with flowers in their natural season is one of the most effective ways to produce professional-looking arrangements at a fraction of the cost. Seasonal flowers are more abundant, less expensive, and in peak physiological condition — they haven’t been held in cold storage for weeks before reaching you.
US Seasonal Availability Guide
- Spring (March–May): Tulips, hyacinths, ranunculus, peonies (late May), lilac, anemones, daffodils. Cool-season crops that prefer temperatures below 65°F during growth.
- Summer (June–August): Dahlias, zinnias, sunflowers, lisianthus, lavender, sweet peas, cosmos, snapdragons (early summer), echinacea, rudbeckia.
- Fall (September–November): Dahlias (through first frost), chrysanthemums, marigolds, celosia, ornamental kale, amaranthus, autumn-blooming sedums.
- Winter (December–February): Amaryllis, paperwhites, forced branches (pussy willow, quince), carnations (year-round, but peak quality in winter), tropical imports (protea, anthuriums, birds of paradise).
Flowers That Forgive Beginner Mistakes
Some flowers are structurally forgiving — they hold their form under imperfect conditions and stay fresh longer than average. Chrysanthemums are among the longest-lasting cut flowers, often lasting 14–21 days with proper care. Carnations, despite their unfashionable reputation, have a vase life of 14–21 days and tolerate marginal conditioning better than almost any other cut flower. Lisianthus looks like a peony at roughly one-tenth the cost and holds beautifully for 10–14 days. Zinnias, cut in the early morning from garden plants with a two-node pruning cut, can last 7–10 days with daily water changes.
Flowers That Demand More Attention
Gardenias are almost impossible to use as cut flowers — the white petals brown on contact and they have virtually no vase life. Sweet peas are beautiful but delicate, lasting only 3–5 days even with perfect conditioning, and they wilt rapidly in warm rooms. Tulips are deceiving: they continue growing after cutting (sometimes by 2–3 inches) and their stems bend toward light. Use them in arrangements where some movement is acceptable, or re-cut and rehydrate them tightly wrapped in paper overnight to straighten them before arranging.
Pro Tips for Extending Vase Life
Florists maintain commercial inventory for 7–14 days, sometimes longer. These are the specific practices that make that possible.
- Change water every two days: Fresh water with a new preservative packet every 48 hours reduces bacterial buildup dramatically. Re-cut stems by ¼ inch each time you change the water.
- Keep arrangements away from air vents and ceiling fans: Airflow accelerates transpiration and desiccates petals. A slightly humid, cool room is ideal.
- The overnight refrigerator trick: Place your entire arrangement in the refrigerator each night, particularly in summer. Studies show this alone can add 2–4 days to vase life for roses and mixed arrangements.
- Avoid proximity to fruit: As noted earlier, ethylene from ripening fruit is a significant accelerant of petal drop. The effect is measurable within 24 hours of exposure.
- Recut hollow or woody stems underwater: Cutting in a basin of water prevents air from immediately re-entering the xylem before the stem reaches the vase. This is standard practice in professional conditioning rooms.
- Remove spent blooms promptly: As individual flowers in a mixed arrangement die, they release ethylene. Remove them immediately to protect the remaining blooms.
Sourcing Flowers: Where to Buy and What to Look For
Where you source your flowers matters as much as what you do with them. Flowers sold at grocery stores and big-box retailers are typically 5–10 days old by the time they reach the shelf, having traveled from Ecuador, Colombia, or the Netherlands — the three dominant sources for US cut flower imports, which together account for roughly 80% of flowers sold in America.
Sourcing Options by Priority
Your own garden: The freshest possible source. Cut in the early morning or evening when stem water pressure is highest. Cutting in the heat of the day causes rapid wilting.
Local farmers markets and farm stands: Flowers cut within 24–48 hours and often sold the same day. Many vendors sell by the bucket for $15–$25, providing enough material for multiple arrangements. Seasonal variety is excellent, and you can often request specific stems from local growers.
Retail florists and flower shops: More expensive per stem than markets, but professional-grade conditioning and a wider variety of specialty blooms. Good for filler and foliage that’s difficult to grow at home.
Wholesale floral markets: Cities with active floral districts (Los Angeles, San Francisco, Miami, New York, Chicago) have wholesale markets that occasionally open to the public on weekends. Prices run 30–60% below retail, but minimums can be high and variety is staggering enough to overwhelm a first-time visitor.
Online floral wholesalers (FiftyFlowers, Mayesh, BloomsByTheBox): Sell direct-to-consumer in grower’s bunches, typically 10–25 stems per bunch. Minimum orders often run $75–$150, making this practical for events or large arrangements rather than a single vase. Flowers arrive overnight-shipped and need 24–48 hours of conditioning on arrival.
Frequently Asked Questions
How do you arrange flowers like a florist at home without expensive tools?
You can achieve professional results with a sharp pair of kitchen shears (replaced by floral snips ideally), a clean glass vase, waterproof tape for a stem grid, and commercial floral preservative packets (available at craft stores for under $5 for a pack of 10). The technique matters more than the tools. Focus on conditioning overnight, the three-layer construction method, and proper stem prep — these steps cost nothing beyond time.
What is the most important step in flower arranging that beginners skip?
Conditioning — the 12–24 hour rest period in cool, deep water before arranging — is the step most home arrangers skip, and it has the greatest single impact on vase life and bloom quality. Flowers placed directly from the store into an arrangement without conditioning may wilt within 24–48 hours. Conditioned flowers regularly last 7–14 days.
How do florists keep flower arrangements fresh so long?
Professional florists use a combination of cold storage (34–38°F), commercial preservatives, frequent water changes with stem re-cuts, bacterial-free containers, and prompt removal of ethylene-producing spent blooms. The cold storage component is the hardest to replicate at home, but refrigerating arrangements overnight can add 2–4 days to vase life.
What flowers are easiest to arrange for beginners?
Chrysanthemums, carnations, and lisianthus are the most forgiving cut flowers for beginners — all have vase lives of 14–21 days, tolerate marginal conditioning, and hold their structure well in arrangements. Sunflowers and zinnias are excellent choices from the garden, lasting 7–10 days with daily water changes and early-morning cutting.
How many flowers do you need for a full-looking arrangement?
For a medium vase arrangement (8–10 inches tall), a working minimum is: 3–5 focal blooms, 5–7 secondary blooms, and 3–5 filler or foliage stems — roughly 12–18 stems total. Fewer stems are fine for bud vases or minimalist styles, but a lush, full arrangement typically requires at least 15 stems across three flower types.
Building a Practice Habit: How to Actually Get Better
Florists get good at their craft by arranging flowers constantly — often five days a week, for years. You don’t need that volume, but you do need repetition. One intentional arrangement per week for a full growing season (roughly 20–24 arrangements) is enough to move from “I sometimes get lucky” to “I reliably produce results I’m proud of.”
Keep a simple photo log. Photograph each arrangement from the front immediately after finishing, and again at 48 hours. Over time, you’ll see exactly which techniques, flower combinations, and conditioning methods produce the results you want — and which don’t. This kind of feedback loop, accelerated by documentation, is how professional designers develop their eye.
Try deliberately practicing just one technique per arrangement: one week, focus only on the three-layer construction sequence. The next week, experiment exclusively with a monochromatic color palette. The week after, practice the hand-tied spiral until the stem angles feel automatic. Isolated practice of individual skills builds competence faster than attempting to perfect everything at once.
The florist’s craft is a physical skill with a strong intellectual foundation. The biology, the color theory, and the design principles give you the map. The weekly practice gives you the hands. Start with one bucket of conditioned flowers this weekend and build from there.