How to Start a Cut Flower Garden: Everything You Need to Know
19 min readContents:
- What Is a Cut Flower Garden — and How Does It Differ from a Regular Flower Bed?
- Cut Flower Garden vs. Pollinator Garden: Know the Difference
- Choosing the Right Site to Start a Cut Flower Garden
- Sun, Drainage, and Access
- How Much Space Do You Actually Need?
- Soil Preparation: The Foundation of Long Stems and Healthy Plants
- Target Soil Structure and pH
- Building the Perfect Cut Flower Bed
- The Best Cut Flowers to Grow for Beginners
- Annual Cut Flowers: High Yield, One Season
- Perennial and Bulb Crops Worth Including
- How to Start a Cut Flower Garden with a Planting Schedule
- Spring Planning (8 to 10 Weeks Before Last Frost)
- Early Season Planting (4 to 6 Weeks Before Last Frost)
- Main Season Planting (After Last Frost)
- Late Season Planning (Mid-to-Late Summer)
- Watering, Fertilizing, and Supporting Your Cut Flower Crops
- Irrigation Strategies That Work
- Feeding Your Flowers for Maximum Stem Length
- Staking and Support Systems
- Harvesting Cut Flowers: Timing, Technique, and Conditioning
- When to Cut Each Flower Type
- Cutting Technique and Conditioning
- What the Pros Know: The Pinching and Cut-and-Come-Again Principle
- Managing Common Pests and Diseases in the Cut Flower Garden
- Aphids and Thrips
- Powdery Mildew and Botrytis
- Extending Your Season with Row Cover and Season Extension Tools
- Practical Tips for Getting More From Your Cut Flower Garden
- Budgeting and Planning Your First Cut Flower Garden
- Startup Costs
- What to Reuse Year After Year
- Frequently Asked Questions About Starting a Cut Flower Garden
- What is the easiest cut flower to grow for beginners?
- How do I keep cut flowers fresh longer after harvesting?
- When should I start a cut flower garden?
- How much sun does a cut flower garden need?
- Can I grow cut flowers in raised beds or containers?
- Building Your Garden Into the Future
The average grocery store bouquet travels over 1,500 miles before it reaches the display cooler — and loses up to 40% of its vase life in transit. Growing your own cut flowers solves that problem entirely. When you start a cut flower garden, you’re not just planting seeds; you’re building a system that delivers fresher, longer-lasting blooms than anything wrapped in cellophane at the checkout line.
Cut flower gardening has surged in popularity across the United States over the past decade, driven partly by the farm-to-table ethos spreading into home gardening. The global cut flower market is projected to exceed $47 billion by 2030, but backyard growers are quietly reclaiming a piece of that economy — saving an estimated $600 to $2,000 annually on floral arrangements, depending on how frequently they buy flowers.
This guide covers everything: site selection, soil preparation, which flowers to grow for maximum impact, how to succession plant for continuous blooms from May through October, and how to harvest and condition stems so arrangements last 10 to 14 days instead of four.
What Is a Cut Flower Garden — and How Does It Differ from a Regular Flower Bed?
A cut flower garden is designed with one explicit goal: producing stems worth bringing indoors. That distinction changes nearly every decision you make, from spacing to fertilizing to pruning.
A standard ornamental flower bed prioritizes curb appeal. Plants are spaced for visual fullness, deadheaded to extend flowering, and often chosen for landscape form as much as bloom quality. A cut flower garden, by contrast, prioritizes stem length, vase life, and staggered harvest windows. You’ll grow flowers closer together — sometimes in rows as tight as 6 inches — to encourage long, straight stems rather than bushy, branching plants.
Cut Flower Garden vs. Pollinator Garden: Know the Difference
These two garden types are frequently confused, especially since many of the same species appear in both. The difference lies in intent and management. A pollinator garden is managed to support bees, butterflies, and other beneficial insects — plants are left to bloom fully, set seed, and provide habitat. Harvesting stems actively works against that goal.
A cut flower garden can overlap with pollinator support (and many growers intentionally include some “leave-alone” rows), but the primary management strategy is intervening before flowers fully open. You cut stems in bud or at early-open stage to maximize vase life. This removes nectar and pollen before many pollinators benefit from it.
If supporting pollinators matters to you — and ecologically, it should — dedicate a separate border or leave the last flush of each crop unharvested. That simple practice lets you have both.
Choosing the Right Site to Start a Cut Flower Garden
Sun is non-negotiable. Most productive cut flower crops require a minimum of 6 to 8 full hours of direct sunlight daily. Less than that, and you’ll see elongated, weak stems and reduced flower production — the opposite of what you need for cutting.
Sun, Drainage, and Access
Choose the sunniest, most open area of your property. Avoid the north side of buildings, areas shaded by mature trees, and low-lying spots where cold air and water pool. South-facing or west-facing slopes are ideal in most of USDA Hardiness Zones 4 through 9, which covers the majority of US growing regions.
Drainage matters as much as sun. Saturated soil kills young transplants and promotes fungal diseases like botrytis, which can destroy entire successions of lisianthus or ranunculus in a wet spring. If your best sunny spot has heavy clay, raise your beds by 6 to 8 inches using amended soil or construct formal raised beds. Even modest elevation dramatically improves drainage and extends your planting season by warming soil 2 to 3 weeks earlier in spring.
Access is an underrated consideration. You’ll visit this garden daily during peak season — watering, harvesting, tying, scouting for pests. Site it close to a water source and within comfortable carrying distance of your house. A bucket of freshly cut stems gets heavy fast.
How Much Space Do You Actually Need?
A beginner cut flower patch of 100 square feet — roughly 10 feet by 10 feet — can produce enough stems for two to three medium arrangements per week throughout the growing season. A serious home grower managing 400 to 500 square feet can supply weekly bouquets for an entire household and have enough surplus for neighbors, markets, or small CSA flower subscriptions.
Start modestly. A 4-foot by 8-foot raised bed with four to six different species will teach you more about timing, succession planting, and harvest technique than reading ever can.
Soil Preparation: The Foundation of Long Stems and Healthy Plants
Soil is where most beginner cut flower gardens fail silently. Plants may grow and bloom, but stems stay short, flowers are small, and plants exhaust themselves by midsummer. The fix is almost always in the soil.
Target Soil Structure and pH
Cut flower crops perform best in loose, well-draining, biologically active soil with a pH between 6.0 and 6.8. At this pH range, the full spectrum of macro and micronutrients — nitrogen, phosphorus, potassium, calcium, iron, and manganese — is most bioavailable to plant roots.
Test your soil before planting. County extension offices across the US offer soil testing for $15 to $25, typically with specific amendment recommendations included. A basic home test kit from any garden center costs around $10 and gives a reasonable estimate of pH, nitrogen, phosphorus, and potassium levels. Don’t skip this step. Adding fertilizer to soil that already has excess phosphorus or nitrogen wastes money and can actively harm plant development.
Building the Perfect Cut Flower Bed
For native soil beds, begin by turning the existing soil to a depth of 12 inches. Remove rocks, roots, and compacted clods. Incorporate 3 to 4 inches of finished compost across the entire surface — that’s approximately 1 cubic yard of compost per 100 square feet. Work it in thoroughly. This single amendment improves drainage in clay soils, increases water retention in sandy soils, and introduces the microbial activity that drives nutrient cycling.
If you’re building raised beds, a reliable all-purpose mix is one-third topsoil, one-third compost, and one-third coarse horticultural perlite or aged wood chips. This blend drains freely, holds adequate moisture between waterings, and provides enough organic matter to sustain a full season of aggressive cutting crops.
Before planting, work in a balanced granular fertilizer at the manufacturer’s recommended rate — typically 3 to 4 pounds of a 10-10-10 formula per 100 square feet. This baseline feeding supports root establishment and early vegetative growth. You’ll supplement throughout the season based on crop needs.
The Best Cut Flowers to Grow for Beginners
Species selection is where new growers tend to overcomplicate things. A short list of reliable, high-yield crops will produce more usable stems than an ambitious mix of difficult specialty flowers. Master the fundamentals first.
Annual Cut Flowers: High Yield, One Season
Zinnias (Zinnia elegans) are the most forgiving and productive annual for beginner cut gardens. A single plant, properly pinched at transplant stage, will produce 20 to 30 stems over a season. The ‘Benary’s Giant’ series produces stems 18 to 24 inches long with double flowers 4 to 5 inches across — among the most vase-ready zinnias available. Direct sow after last frost date or start indoors 4 to 6 weeks before transplanting.
Sunflowers (Helianthus annuus) offer enormous impact with minimal care. For cut flower use, choose branching varieties like ‘ProCut Orange’, ‘Italian White’, or the ‘Joker’ series rather than the single-stem giant types. Branching sunflowers produce multiple 2 to 3 inch blooms per plant from midsummer through fall. Direct sow every 2 to 3 weeks from May through early July for a continuous harvest.
Lisianthus (Eustoma grandiflorum) is technically intermediate-level difficulty but earns its place on this list because of its extraordinary vase life — up to 3 weeks with proper conditioning — and its resemblance to garden roses. Start from transplants (growing from seed takes 6 months) and plant in rich, well-drained soil after your last frost date.
Celosia, specifically the plume types like ‘Flamingo Feather’ and the cockscomb forms, produces dramatically textured stems that dry beautifully. Cut when the plume is fully colored but before it begins to shed pollen. Vase life fresh is 10 to 14 days; dried stems last indefinitely.
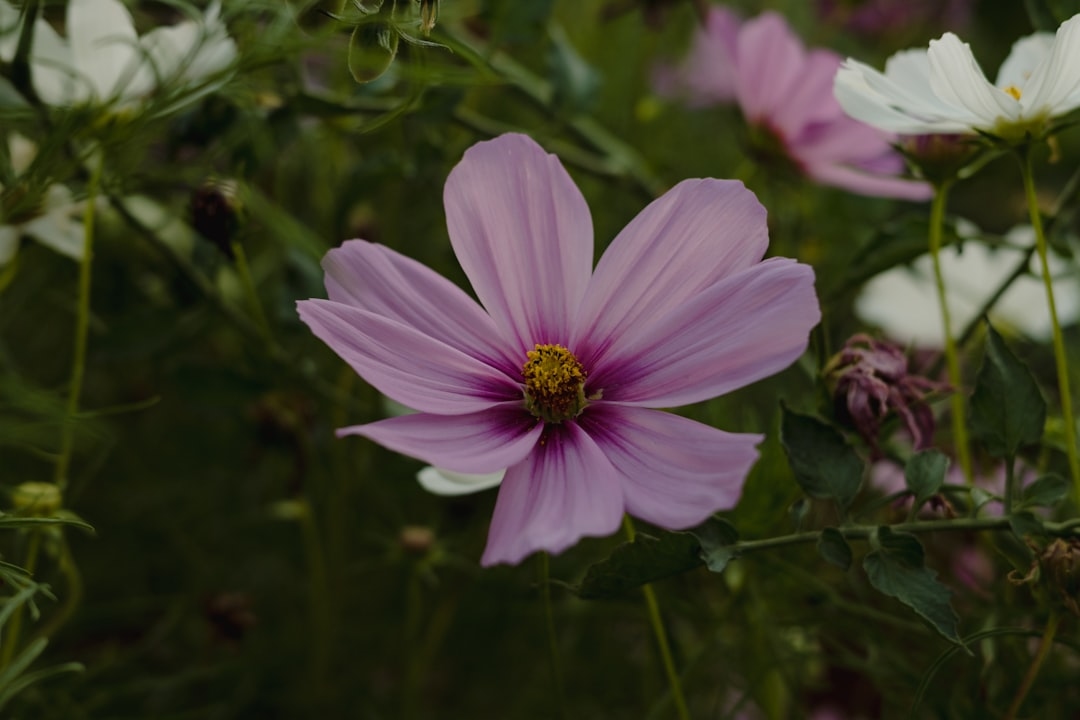
Cosmos (Cosmos bipinnatus) thrives on neglect. Plant in lean soil — too much fertility and you get leaves, not flowers. The ‘Double Click’ series produces ruffled, double-petaled blooms on 24 to 36 inch stems. Cut when one or two florets on each stem are fully open for maximum vase life.
Perennial and Bulb Crops Worth Including
Dahlias are the undisputed royalty of the home cut flower garden. A single tuber planted in May will produce weekly harvests from July through hard frost. Ball and dinner plate varieties like ‘Café au Lait’, ‘Labyrinth’, and ‘Otto’s Thrill’ consistently deliver stems 18 to 24 inches long. Dahlias require regular watering, staking for tall varieties, and weekly cutting to stay productive. They are heavy feeders: apply a low-nitrogen fertilizer like 5-10-10 at half the recommended rate every 3 to 4 weeks once plants reach 12 inches tall.
Tulips fill the critical late-spring gap before most annuals begin producing. For cut flower production, choose species or Darwin hybrid tulips with long, strong stems — ‘Apeldoorn’, ‘World’s Favorite’, or ‘Queen of Night’. Plant bulbs 6 to 8 inches deep in fall. In USDA Zones 7 through 9, pre-chill bulbs in a paper bag in your refrigerator (away from ethylene-producing fruits) for 6 to 8 weeks before planting to ensure proper vernalization.
Coneflowers (Echinacea purpurea) take two years to reach full production as perennials, but from year two onward they provide 12 to 15 inch stems with zero replanting effort. They also attract pollinators when unharvested, making them ideal for the “leave some, cut some” approach.
How to Start a Cut Flower Garden with a Planting Schedule
Succession planting is the single practice that separates a cut flower garden with a two-week bloom burst from one that produces continuously for five months. The concept is simple: instead of planting everything at once, you stagger plantings every 2 to 3 weeks so new crops reach peak harvest just as older ones fade.
Spring Planning (8 to 10 Weeks Before Last Frost)
Start lisianthus, snapdragons, and stock indoors under grow lights 8 to 10 weeks before your last frost date. These cool-season crops need time: rushing them produces stunted, less productive transplants. Use a heat mat to maintain 70 to 75°F soil temperature for germination, then drop to 60 to 65°F once seedlings emerge to encourage stocky growth.
Order dahlia tubers by January or February. Reputable US suppliers — Floret Farm, Swan Island Dahlias, Ferncliff Gardens — sell out of popular varieties by early spring. Store tubers in barely moist vermiculite or peat at 40 to 50°F until planting time.
Early Season Planting (4 to 6 Weeks Before Last Frost)
Transplant snapdragons, stock, and bachelor’s buttons outdoors under row cover or cold frames 4 to 6 weeks before your last frost date. These crops tolerate light frost and perform best in cool conditions — summer heat shuts them down. Getting them in early means you harvest before the heat of July ends their season.
Direct sow larkspur and nigella directly into prepared beds at this time. Both germinate best in cool soil (55 to 65°F) and resent transplanting. Scatter seed thinly, rake in lightly, and water gently. Expect germination in 14 to 21 days.
Main Season Planting (After Last Frost)
After your final frost date, the full palette opens up. Transplant dahlias, plant zinnia seedlings or direct sow, install amaranth, and begin succession plantings of sunflowers. For sunflowers, plant a new row of 6 to 8 plants every 2 weeks from your last frost date through July 1 for a harvest window stretching from midsummer through September.
Zinnias produce most efficiently when pinched at transplant: once your transplant has 3 to 4 sets of true leaves, clip the growing tip just above a leaf node. This forces 2 to 4 lateral branches, each capable of producing a harvestable stem. Un-pinched zinnias produce one central stem and several weaker laterals — a fraction of the output.
Late Season Planning (Mid-to-Late Summer)
In late July and August, sow a final succession of zinnias and fast-maturing sunflowers (60-day varieties) for fall harvest. Plant ‘Montezuma’ or ‘Benary’s Giant’ zinnias from transplant for blooms through October in most zones. In Zones 7 through 9, this is also the time to start cool-season crops like anemones, ranunculus, and pansies for fall and winter production.
Watering, Fertilizing, and Supporting Your Cut Flower Crops
Consistent moisture and steady nutrition translate directly into stem length and flower size — the two metrics that matter most for cutting. Neglect in either area shows up immediately in your bouquets.
Irrigation Strategies That Work
Drip irrigation is the gold standard for cut flower gardens. It delivers water directly to the root zone, keeps foliage dry (reducing fungal disease pressure), and uses 30 to 50% less water than overhead sprinklers. A basic drip system for a 100-square-foot bed costs $50 to $100 in materials and takes a few hours to install.
If overhead watering is your only option, water in the morning so foliage dries completely before evening. Wet foliage overnight is an open invitation to botrytis blight and powdery mildew — both devastating in dense cut flower plantings.
Most cut flower crops need 1 to 1.5 inches of water per week from rain or irrigation. Use a rain gauge to track actual rainfall and supplement accordingly. During heat waves, dahlias and zinnias in particular may need supplemental watering twice a week to prevent stress-induced stem shortening.
Feeding Your Flowers for Maximum Stem Length
Nitrogen drives vegetative growth — stem elongation, leaf mass, and plant size. Phosphorus supports root development and bloom production. Potassium strengthens cell walls, which directly improves vase life.
A practical fertility program for a home cut garden: apply a balanced slow-release granular fertilizer (10-10-10 or 14-14-14) at planting. Then supplement with a liquid fertilizer during peak growing periods. For most annuals, a weekly application of fish emulsion diluted to half strength (typically 1 tablespoon per gallon) from transplant through midsummer keeps growth vigorous without promoting excessive soft tissue that’s vulnerable to disease.
Dahlias are the exception. Once they begin setting buds, switch to a low-nitrogen, high-phosphorus formula like 5-10-10 or 4-12-4. Too much nitrogen at this stage produces lush foliage and soft, weak blooms that collapse in the vase within 24 hours.
Staking and Support Systems
Tall cut flower crops — dahlias, lisianthus, tall zinnias, larkspur — need physical support to prevent wind and rain from snapping stems. The professional standard is the corral system: drive 4-foot stakes every 4 to 5 feet around the bed perimeter and string horizontal twine or jute at 12-inch intervals as plants grow. Plants grow up through the grid and remain upright without individual staking.
For single dahlias, one 5 to 6 foot bamboo stake per plant, installed at planting to avoid disturbing tubers later, is sufficient. Tie loosely with soft garden twine, leaving room for stem diameter to increase.
Harvesting Cut Flowers: Timing, Technique, and Conditioning
How you harvest matters as much as how you grow. A stem cut at the wrong stage or handled carelessly loses a week of vase life before it ever reaches a vase.
When to Cut Each Flower Type
The optimal harvest stage varies significantly by species:
- Zinnias: Cut when the stem passes the “wiggle test” — hold the stem near the base and wiggle gently. If it bends, it’s not ready. If it’s firm and the bloom is fully colored but not yet dropping pollen, cut it.
- Dahlias: Harvest when the bloom is 75 to 90% open. Fully closed dahlias rarely open indoors. Fully open ones have only a few days of vase life remaining.
- Sunflowers: Cut when petals are fully extended but the center disc is still tight and green-black. Once the disc turns yellow-brown and begins releasing pollen, vase life drops sharply.
- Lisianthus: Cut when 1 to 2 buds on the stem are fully open and remaining buds are showing color. The buds will continue opening in the vase over 2 to 3 weeks.
- Larkspur and snapdragons: Cut when 25 to 50% of the florets on the spike are open. The remaining florets open progressively in the vase.
- Cosmos: Cut when 1 to 2 flowers per stem are fully open. Cosmos harvested in tight bud rarely open properly indoors.
Cutting Technique and Conditioning
Always cut stems early morning, before the heat of the day causes plants to begin wilting. Afternoon-harvested stems have depleted their sugar reserves through the day’s photosynthesis and recover more slowly after cutting.
Use sharp, clean pruning shears or a floral knife. Dull blades crush vascular tissue at the cut end, restricting water uptake immediately. Clean your blades with isopropyl alcohol between crops to prevent transferring fungal or bacterial pathogens.
Cut stems longer than you think you need — you’ll trim them again when arranging. Immediately plunge each stem into a bucket of cool water. Never leave cut stems exposed to air for more than 30 seconds; the vascular tissue begins sealing within seconds of the cut.
After harvest, move all stems to a cool, dark location — a basement, garage, or refrigerator — and allow them to “condition” for a minimum of 4 hours, ideally overnight. During this rest period, stems rehydrate fully and cells firm up, dramatically extending vase life. Flowers brought directly from garden to vase skip this critical step and typically last half as long.
Add a commercial floral preservative to your conditioning water. These products (Floralife, Chrysal) contain three components: a biocide that inhibits bacterial growth, a sugar source that provides energy to open buds, and an acidifier that lowers water pH and improves uptake. For a DIY version: combine 1 quart warm water, 1 tablespoon sugar, 1 teaspoon household bleach, and 2 teaspoons lemon juice. It’s not as precise as commercial products but meaningfully outperforms plain water.
What the Pros Know: The Pinching and Cut-and-Come-Again Principle
Professional tip from commercial flower farmers: Every stem you cut is not a loss — it’s a trigger. Most cut flower crops respond to harvesting by generating more lateral branches, each capable of producing another harvestable stem. This is the cut-and-come-again principle, and exploiting it is how small gardens produce volumes that seem impossible on paper.
The technique: when cutting a stem, always cut back to a leaf node with at least one or two strong lateral shoots visible below your cut. Never cut to bare stem. Each lateral you leave becomes the base for the next round of growth. With dahlias, cutting to a Y-shaped junction — where two strong shoots emerge — is the ideal cut point. Commercial dahlia farmers do this instinctively on every harvest cut and generate 15 to 20% more stems per plant over a season than those who cut to the base or at random points on the stem.
Managing Common Pests and Diseases in the Cut Flower Garden
A dense, productive cut flower planting is an attractive environment for a short list of recurring problems. Knowing what to watch for saves entire crops.
Aphids and Thrips
Aphids cluster on new growth and flower buds, excreting sticky honeydew that promotes sooty mold. Inspect the undersides of leaves weekly. Small infestations respond to a strong spray of water from the hose. Larger infestations: apply insecticidal soap (1 to 2% concentration) in the early morning when beneficial insects are less active. Avoid broad-spectrum pesticides — they kill the parasitic wasps and lady beetles that naturally suppress aphid populations.
Thrips are harder to detect until damage appears: silver streaking on petals, distorted buds, and dark fecal spots on blooms. Blue sticky traps hung at flower height monitor thrip pressure. Spinosad, a naturally derived insecticide, is effective against thrips and relatively low-impact on beneficial insects when applied according to label directions.
Powdery Mildew and Botrytis
Powdery mildew appears as a white chalky coating on leaves, most commonly on zinnias, dahlias, and phlox in late summer when nights cool and humidity rises. It’s cosmetically damaging and reduces photosynthetic capacity but rarely kills established plants. Prevention through good airflow — avoid crowding plantings and remove lower leaves — is more effective than treatment. Neem oil or potassium bicarbonate sprays applied at first sign slow progression.
Botrytis (gray mold) is more serious. It thrives in cool, wet conditions and can collapse entire plantings of lisianthus, ranunculus, or snapdragons in days. The only reliable management is environmental: reduce humidity through drip irrigation, improve airflow, and promptly remove any infected plant material. Do not compost botrytis-affected tissue — bag it and dispose of it.
Extending Your Season with Row Cover and Season Extension Tools
A $50 investment in agricultural row cover can extend both ends of your cut flower season by 3 to 4 weeks — adding potentially 6 to 8 more weeks of harvest. Floating row cover (Reemay or equivalent fabric) rated at 1.5 oz per square yard provides approximately 4°F of frost protection and can be placed directly over plantings without damaging soft growth.
In spring, apply row cover over newly transplanted snapdragons and stock to protect them through late frosts. In fall, cover dahlias when overnight temperatures begin dropping below 40°F — dahlias are killed by a single hard frost but will continue blooming through light frosts under cover. This simple practice routinely pushes dahlia season from early October through November in Zones 6 and 7.
Cold frames and low tunnels — hoops of wire or PVC covered with greenhouse poly film — provide more substantial protection (8 to 10°F) for cold-tolerant crops like ranunculus, anemones, and cool-season annuals in Zones 7 through 9, enabling nearly year-round flower production.
Practical Tips for Getting More From Your Cut Flower Garden
- Label everything at planting. Variety names matter enormously for reordering — “the tall orange one” is not a purchasing strategy. Use weather-resistant labels or a permanent marker directly on pot tags.
- Keep a harvest log. Note which crops peaked when, how many stems each variety produced, and which ones underperformed. Two seasons of records will transform how you plan subsequent years.
- Grow filler crops intentionally. Bouquets need more than focal flowers. Dedicate 20 to 30% of your space to fillers: statice, ammi (false queen anne’s lace), bupleurum, eucalyptus (in warm zones), and ornamental grasses all stretch primary blooms and add structural interest.
- Deadhead what you don’t cut. Any bloom allowed to go to seed sends a chemical signal to the plant to stop producing flowers. Regular deadheading — removing spent blooms — keeps production cycles running. If you can’t cut every open bloom, at least deadhead.
- Use a harvest bucket with handles. Sounds trivial. After your third trip to the garden with arms full of stems and a sloshing bucket, you’ll understand. A handled bucket keeps both hands available and prevents accidental stem snapping during transport.
- Store conditioning water clean. Change bucket water every 1 to 2 days during conditioning. Bacterial populations in stagnant water build quickly and form a biofilm in vascular tissue, blocking water uptake. Clean buckets with a 10% bleach solution between uses.
Budgeting and Planning Your First Cut Flower Garden
Starting a cut flower garden doesn’t require significant capital, but having realistic budget expectations avoids mid-season surprises.
Startup Costs
For a 100-square-foot in-ground bed in an existing lawn area, expect to spend:
- Soil amendment (compost, fertilizer): $40 to $80
- Seeds and transplants (6 to 8 varieties): $30 to $60
- Dahlia tubers (6 to 10 tubers): $40 to $90 depending on variety
- Basic tools (shears, trowel, stakes, twine): $50 to $80 if you don’t already own them
- Irrigation materials (drip system): $50 to $100
- Row cover: $20 to $35
Total first-year investment: approximately $230 to $445. By comparison, the average American household spends $66 per year on cut flowers — so your break-even is roughly 4 to 7 years at average spending. But households that regularly buy bouquets for weddings, celebrations, or weekly arrangements spend far more, and the value calculation shifts dramatically.
What to Reuse Year After Year
Dahlia tubers multiply underground each season and can be dug, divided, and replanted — a single purchased tuber becomes 4 to 8 tubers after one season. Perennials like echinacea and yarrow return annually without replanting costs. Tools, irrigation hardware, and stakes are multi-season investments. After the first year, your recurring costs drop to seeds, soil amendments, and any new varieties you add.
Frequently Asked Questions About Starting a Cut Flower Garden
What is the easiest cut flower to grow for beginners?
Zinnias are widely considered the easiest cut flower for beginners. They germinate reliably in warm soil, tolerate heat and moderate drought, resist most common diseases, and produce harvestable stems 50 to 60 days from transplant. A pinched zinnia plant can yield 20 to 30 cuttable stems over a single growing season with minimal inputs.
How do I keep cut flowers fresh longer after harvesting?
Cut stems in the early morning with clean, sharp shears. Immediately place stems in cool water and move them to a dark, cool space — ideally 38 to 45°F — to condition for at least 4 hours before arranging. Use a commercial floral preservative in conditioning and vase water. Change vase water every 2 days and recut stems at a 45-degree angle each time. Keep arrangements away from direct sun, heating vents, and ripening fruit, which emits ethylene gas that accelerates petal drop.
When should I start a cut flower garden?
Planning begins in winter (December through February): order seeds and dahlia tubers, test your soil, and map your planting schedule around your last frost date. Cool-season crops like snapdragons and larkspur go in 4 to 6 weeks before the last frost. Warm-season crops — zinnias, sunflowers, dahlias — go in after the last frost date, which ranges from March in Zone 9 to late May in Zone 4.
How much sun does a cut flower garden need?
Most productive cut flower crops require 6 to 8 hours of direct sunlight daily. Fewer hours than this produces weak, elongated stems and reduced flower output. Some shade-tolerant species — lisianthus, astilbe, sweet peas — can manage with 4 to 6 hours, but they’re the exception, not the rule.
Can I grow cut flowers in raised beds or containers?
Yes. Raised beds are actually preferred for cut flower production because they drain better, warm faster in spring, and are easier to amend than native soil. Fill raised beds with a mixture of topsoil, compost, and perlite. Large containers (15 gallons or more) work well for dahlias and smaller zinnia varieties. Standard 5-gallon containers are too small for most productive cut flower crops — root restriction shortens stems and reduces plant lifespan.
Building Your Garden Into the Future
The most valuable thing a first cut flower season gives you is data. By the time you pull your last dahlia tubers in October, you’ll know which varieties thrived in your specific microclimate, which succession plantings hit their harvest windows perfectly, and which species you’ll never grow again. That knowledge compounds.
Year two, you add a cold frame for ranunculus. Year three, you trial a new dahlia variety and dedicate a row to dried flowers for winter arranging. Year four, you’re selling $25 bouquets at the farmer’s market on Saturday mornings.
None of that starts without the first bed and the first planting. Pick your sunniest 100 square feet. Test your soil this week. Order your dahlia tubers before they sell out. The flowers you’re still thinking about planting in March are the same ones you’ll be arranging in July — if you start now.