The Ultimate Guide to Dividing and Transplanting Perennials
20 min readContents:
- Why Perennials Need Division: The Biology Behind the Practice
- Which Perennials Need Division Most Urgently
- Seasonal Timeline for Dividing and Transplanting Perennials
- Month-by-Month Division Calendar
- Reading Soil Temperature, Not Just Air Temperature
- Regional Differences in Timing and Technique
- Northeast and Upper Midwest (Zones 4–6)
- Southeast and Gulf Coast (Zones 7–9)
- Pacific Northwest (Zones 7–9, West Coast)
- Desert Southwest (Zones 8–10)
- Tools and Preparation: Setting Up for Success
- Essential Tools
- Soil Preparation for the Transplant Site
- Step-by-Step: How to Divide and Transplant Perennials
- Step 1: Water the Plant Deeply 24–48 Hours Before Division
- Step 2: Lift the Entire Clump
- Step 3: Separate the Divisions
- Step 4: Inspect, Trim, and Treat
- Step 5: Replant at the Correct Depth
- Step 6: Water Thoroughly and Mulch
- Aftercare: The 6-Week Window That Makes or Breaks Transplanting
- Watering Protocol
- Fertilization Timing
- Managing Wilting and Early Stress Signs
- Propagation and Sharing: Getting the Most From Division
- Storing and Transporting Divisions
- When Divisions Are Worth Selling or Trading
- Common Mistakes and How to Avoid Them
- Dividing at the Wrong Time of Year
- Making Divisions Too Small
- Replanting the Central Crown
- Skipping Crown Depth Calibration
- Failing to Water Consistently After Transplanting
- Special Cases: Challenging Perennials Worth Extra Attention
- Peonies
- Ornamental Grasses
- Hostas
- Bearded Iris
- Frequently Asked Questions
- What is the best time of year for dividing transplanting perennials?
- How do I know when a perennial needs to be divided?
- Can I divide perennials while they are blooming?
- How large should each division be?
- Should I fertilize after dividing and transplanting perennials?
- Moving Forward: Building a Division Schedule Into Your Garden Calendar
A single daylily clump, left undivided for a decade, can expand to over three feet in diameter—crowding out neighboring plants, exhausting the soil, and producing fewer blooms each year. Most gardeners wait too long. The science is clear: the majority of garden perennials benefit from division every three to five years, yet surveys of home gardeners consistently show that fewer than 40% divide their plants on any regular schedule. The result is a garden that quietly declines while appearing merely “mature.”
Dividing and transplanting perennials is one of the highest-leverage skills in the gardening toolkit. Done correctly, it rejuvenates tired plants, multiplies your stock for free, and reshapes a garden’s design with minimal expense. Done poorly—wrong timing, clumsy technique, inadequate aftercare—it can set plants back an entire growing season or kill them outright.
This guide covers everything: the biology behind why division works, how to read your plants for signs that it’s time, a month-by-month seasonal calendar, regional adaptations for different U.S. climates, and a step-by-step methodology for clean, successful transplanting. Whether you’re managing a small urban bed or a sprawling suburban border, the principles are the same—and the rewards are substantial.
Why Perennials Need Division: The Biology Behind the Practice
To divide a perennial intelligently, it helps to understand what’s actually happening underground. Most herbaceous perennials—plants that die back to the ground in winter and regrow from their root systems each spring—spread outward from a central crown. New growth emerges at the perimeter, while the original center ages, becomes woody, and loses vigor. Botanists call this process “clump senescence.”
As the clump expands, roots compete with each other for water, nutrients, and oxygen in the soil. A dense, congested root mass also creates anaerobic zones where beneficial soil microorganisms can’t thrive, and fungal diseases find easier purchase. The outer ring of newer growth remains healthy, but the plant as a whole underperforms because its energy is spread across a vast, increasingly dysfunctional root system.
Division solves this by removing the exhausted center and replanting only the vigorous outer portions. You’re essentially resetting the plant to its most productive phase. Research from horticultural extension programs at universities including Cornell and Clemson has demonstrated that divided hostas and daylilies produce 30–50% more flowering stems in the two seasons following division compared to undivided controls of the same age.
Which Perennials Need Division Most Urgently
Not all perennials have the same division urgency. Fast-spreading species need attention more frequently; slow growers can go longer between interventions.
- Every 2–3 years: Black-eyed Susan (Rudbeckia), bee balm (Monarda), yarrow (Achillea), and asters. These are vigorous spreaders that exhaust soil quickly and can become invasive if neglected.
- Every 3–5 years: Daylilies (Hemerocallis), coneflowers (Echinacea), ornamental grasses, hostas, and salvias. The workhorses of most perennial beds fall in this category.
- Every 5–10 years (or rarely): Peonies (Paeonia), astilbe, bleeding heart (Dicentra), and hellebores. These resent disturbance and are best left alone unless showing clear decline.
- Almost never: Baptisia (false indigo), gas plant (Dictamnus), and Japanese anemone. These deep-rooted perennials establish slowly and rarely benefit from division.
A useful diagnostic: if a clump has a dead or hollow center, produces noticeably fewer flowers than it did three years ago, or has begun heaving out of the soil (common in cold climates due to freeze-thaw cycles), it’s overdue for division.
Seasonal Timeline for Dividing and Transplanting Perennials
Timing is the single most important variable in successful division. The governing principle is simple: divide perennials when they are not actively flowering and when temperatures allow for root establishment before the next stress period, whether that’s summer heat or winter cold.
Month-by-Month Division Calendar
March – April (Early Spring): The prime window for dividing summer- and fall-blooming perennials. Soil temperatures are rising above 50°F, which stimulates root growth, but tops haven’t fully emerged—meaning the plant is investing its energy downward, not upward. Target ornamental grasses (cut back hard first), daylilies, hostas, coneflowers, salvia, and asters. Aim to divide before growth exceeds 4–6 inches for best results.
May – June (Late Spring): A secondary window, though riskier as temperatures climb. If you missed the early spring opportunity for summer bloomers, work quickly in the cooler parts of the day and water heavily post-transplant. Spring bloomers like primrose and lungwort (Pulmonaria) can be divided immediately after flowering—typically late May in most of the U.S.—while the plant still has energy to re-establish before summer.
July – August (Midsummer): Generally the worst time to divide most perennials. Heat stress compounds transplant shock, and soil moisture is hardest to maintain. The exception: bearded iris. These are traditionally divided in July or early August, immediately after their foliage begins to yellow. Iris rhizomes need the late-summer warmth to establish new feeder roots before fall dormancy.
September – October (Early Fall): The second-best window for most perennials, and arguably the best for spring bloomers. Soil temperatures remain warm enough for root growth (above 50°F through October in most of USDA Zones 5–8), while air temperatures cool and reduce moisture stress. Divide and transplant phlox, rudbeckia, hostas, and daylilies in early fall, giving plants 6–8 weeks before hard frost to develop roots.
November – February (Late Fall and Winter): Division is not recommended during this period in most of the U.S. Transplanting into cold or frozen soil prevents root establishment. In mild-winter climates (Zones 9–10, including coastal California and the Gulf Coast), late fall division of certain species remains viable, but it’s the exception, not the rule.
Reading Soil Temperature, Not Just Air Temperature
Air temperature is a rough proxy; soil temperature is what actually matters for root development. A $15 soil thermometer is one of the most useful investments a serious gardener can make. Roots of most temperate perennials grow actively between 50°F and 68°F. When soil drops below 40°F, root regeneration essentially halts, meaning a transplant moved into cold ground is merely surviving—not establishing—until spring.
Regional Differences in Timing and Technique
The U.S. spans USDA Hardiness Zones 3 through 11, and what works in Massachusetts can fail spectacularly in Mississippi. Here’s how regional climates modify the standard division playbook.
Northeast and Upper Midwest (Zones 4–6)
Gardeners in New England, New York, Pennsylvania, and the upper Midwest have a defined spring window—roughly mid-March through late April depending on latitude—and a reliable fall window from late August through early October. The biggest regional challenge is freeze-thaw heaving: perennials divided in fall may be pushed out of the soil by repeated freezing and thawing. Counter this by mulching transplants with 3–4 inches of shredded leaves or straw after the ground cools, and by planting slightly deeper than you would in spring (about ½ inch deeper than the original crown depth).
Winter injury is also a concern for borderline-hardy species. In Zone 5, plants like agapanthus and some ornamental salvias may not survive a hard winter even when well-established; newly divided plants are even more vulnerable. Prioritize spring division for anything with marginal cold hardiness.
Southeast and Gulf Coast (Zones 7–9)
The Southeast inverts much of the conventional timing wisdom. Summers are brutal—100°F heat indexes are common in Georgia and Alabama—so fall division (September through November) is strongly preferred over spring for most perennials. Plants divided in fall have the entire mild winter to establish roots and are ready to surge into growth by February or March.
Spring division is compressed here: the window between last frost and oppressive heat can be as short as six weeks in Zone 8. Work fast, water aggressively, and provide temporary shade cloth (30–40% light reduction) for divisions transplanted in spring. Louisiana iris, a regional specialty, is best divided in late August to September.
The Southeast also deals with heavier clay soils in many areas. Amending transplant holes with 25–30% by volume of compost or aged pine bark significantly improves drainage and root penetration for transplanted perennials.
Pacific Northwest (Zones 7–9, West Coast)
The Pacific Northwest enjoys the most forgiving division climate in the country. Mild, wet winters and relatively cool summers allow for extended fall and early spring planting windows. Portland, Oregon and Seattle, Washington gardeners can successfully divide most perennials from late September all the way through November, and again from late February through May. The primary concern is not temperature but waterlogging: dividing in wet soil compacts structure and invites root rot. Wait for a dry stretch of several days before working perennial beds.
Rhododendron and fern communities in the Pacific Northwest also influence the shade perennial palette. Hostas, astilbe, and coral bells (Heuchera) thrive there, and all three can be divided in early spring or early fall with excellent results.
Desert Southwest (Zones 8–10)
Phoenix, Tucson, and Albuquerque operate on an almost entirely different horticultural calendar. The “cool season” from October through March is the growing season for many adapted perennials, while summer is the dormant stress period. Division and transplanting should happen in October or February—never in summer, and cautiously in spring as temperatures climb past 90°F.
Water management post-division is critical in arid climates. Newly divided perennials need consistent moisture for 4–6 weeks, which may mean watering every 2–3 days in the fall desert, compared to every 5–7 days in the Northeast. Mulching with 3 inches of gravel or organic material (depending on aesthetics and plant type) dramatically reduces soil moisture loss.
Tools and Preparation: Setting Up for Success
Improvised tools damage roots and make the work harder than it needs to be. A small investment in the right equipment pays off in cleaner divisions and faster recovery.
Essential Tools
- Spading fork: Preferred over a flat spade for lifting most perennial clumps. The tines penetrate compacted soil around roots without slicing through them as aggressively as a flat blade. A long-handled model with 11-inch tines (standard for heavy clumps) reduces back strain.
- Sharp, flat-bladed spade: For cutting through large, established clumps of ornamental grasses, daylilies, and coneflowers. The blade should be sharpened before use—a dull blade crushes rather than cuts root tissue.
- Hand pruners or a serrated knife: For dividing smaller clumps (hostas, coral bells) or cutting cleanly through fibrous root mats. Sanitize before use with a 10% bleach solution or 70% isopropyl alcohol to prevent disease transmission.
- Garden hose with a strong spray setting: For washing soil from root systems so you can see what you’re working with and separate divisions cleanly.
- Wheelbarrow or large tarp: To stage the mother clump while you work and to move divisions efficiently.
Soil Preparation for the Transplant Site
If transplanting to a new location, prepare the destination bed before lifting the mother plant—not after. Perennials should spend as little time out of the ground as possible; ideally, the transit time from old hole to new hole is under 30 minutes. In practice, aim to keep roots moist and shaded throughout the entire process.
Amend the transplant site with 2–3 inches of compost worked into the top 12 inches of soil. For heavy clay soils, adding perlite at 10–15% by volume improves drainage without reducing moisture retention excessively. Avoid adding high-nitrogen fertilizers at planting time—they push top growth at the expense of root development, which is the opposite of what a newly divided plant needs.
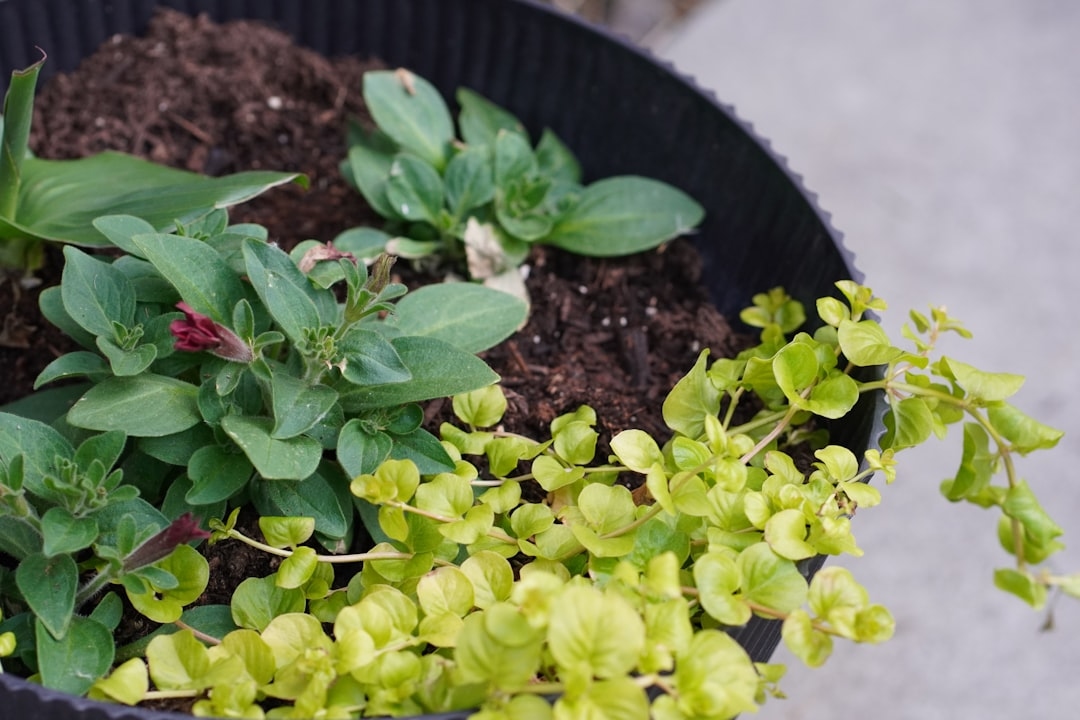
Step-by-Step: How to Divide and Transplant Perennials
The process breaks down into six stages. Each step has specific actions that separate clean, professional-quality division from the kind of rough handling that sets plants back for an entire season.
Step 1: Water the Plant Deeply 24–48 Hours Before Division
Hydrated roots are more resilient to disturbance and recover faster. Water the clump thoroughly—enough to saturate the root zone to a depth of 8–10 inches—the day before you plan to divide. This also loosens the surrounding soil, making lifting easier and reducing root breakage. Do not divide a drought-stressed plant; wait until after a rain or after thorough watering.
Step 2: Lift the Entire Clump
Insert the spading fork 6–8 inches outside the visible perimeter of the clump (roots extend further than the foliage suggests) and work around the plant in a circle, pushing the fork down to its full depth and prying upward. For large clumps—mature hostas or daylilies can weigh 20–40 pounds—you may need a second fork inserted opposite the first to lever the mass out of the ground.
Once lifted, move the clump to a shaded work area. Lay it on a tarp or in a wheelbarrow. Examine the root mass: you should be able to identify the older, woody center (usually paler, denser, often hollow or dead at the core) and the younger, more vigorous outer growth with white, actively growing root tips.
Step 3: Separate the Divisions
Technique varies by root type:
- Fibrous-rooted clumps (hostas, daylilies, coneflowers): Use two spading forks inserted back-to-back into the center of the clump and lever apart. This “back-to-back fork” method is gentler than cutting and works well for medium-sized clumps. For very large or dense clumps, use a sharp spade or serrated knife.
- Rhizomatous plants (iris, Solomon’s seal, lily of the valley): Wash the soil away to expose the rhizomes, then use pruners to cut individual sections, each with at least one healthy growth bud (called an “eye”) and a set of feeder roots. Discard any soft, brown, or hollow rhizome sections, which may be infected with rot.
- Tap-rooted plants (baptisia, coneflower seedlings): These are difficult to divide and rarely benefit from it. When attempted, use a sharp spade and accept that some root loss will occur. Division of tap-rooted species is best done only in early spring when the crown is small and visible.
Target division sizes that each contain 3–5 healthy shoots and an adequate root system—roughly the size of a softball to a grapefruit for most species. Smaller divisions survive but take longer to establish; larger ones transplant more easily but provide fewer new plants per division.
Step 4: Inspect, Trim, and Treat
Before replanting, examine each division. Remove any dead or rotten roots with clean cuts. Trim foliage by one-third to one-half to reduce transpiration demand while the root system re-establishes—the plant simply can’t support its full leaf canopy while growing new roots. For fall divisions, cut ornamental grass clumps back to 4–6 inches; for spring divisions, trim emerging foliage to about 3 inches.
For divisions that will be stored or shared, dip root systems briefly in a solution of water with a small amount of rooting hormone dissolved in it, or dust cut root surfaces with powdered mycorrhizal inoculant. Studies from Kansas State University’s horticulture department showed that mycorrhizal inoculant applications at transplanting increased establishment rates of divided perennials by approximately 20% compared to untreated controls.
Step 5: Replant at the Correct Depth
Crown depth is critical. The crown—the junction where roots meet stems—should sit at exactly the same depth it was growing before, or no more than ½ inch deeper in cold climates where heaving is a concern. Planting too deep is one of the most common errors in perennial transplanting. It invites crown rot (which kills the plant from the center out), reduces flowering, and leads to slow establishment.
As a practical check: after backfilling and firming the soil, you should be able to see the base of the lowest leaves at or just above the soil line for most species. Exceptions include iris, which are planted with rhizomes partially exposed above the soil surface, and plants that naturally grow as ground-level rosettes.
Firm the soil around the division by hand or with gentle foot pressure to eliminate large air pockets, which desiccate roots. Do not compact the soil so heavily that drainage is impaired.
Step 6: Water Thoroughly and Mulch
Water each transplant immediately after planting with 1–2 gallons of water (for a division the size of a standard pot), applying it slowly so the soil absorbs rather than runs off. This settles the soil around roots and provides immediate hydration to stressed tissue.
Apply 2–3 inches of organic mulch (shredded leaves, straw, wood chips) around the transplant, keeping it 2 inches away from the crown to prevent rot. Mulch moderates soil temperature, retains moisture, and suppresses competing weeds during the critical 4–6 week establishment period.
Aftercare: The 6-Week Window That Makes or Breaks Transplanting
Division success is not determined at the moment of planting—it’s determined by what happens in the weeks that follow. Root regeneration, not top growth, is the priority during this period, and every aftercare decision should support that goal.
Watering Protocol
Newly divided perennials need consistent soil moisture for 4–6 weeks. In practical terms:
- First two weeks: Water every 2–3 days in the absence of rain, delivering water slowly to the root zone (not overhead). Soil should remain evenly moist but not waterlogged.
- Weeks 3–4: Transition to every 4–5 days if temperatures are moderate, stretching the intervals gradually to encourage deeper root exploration.
- Weeks 5–6: Treat as established plants for watering purposes if the division shows visible new growth, which signals successful root establishment.
A simple test: push a finger 2 inches into the soil near the transplant. If it’s dry at that depth, water immediately; if it’s moist, wait another day. Don’t rely on surface appearance, which dries quickly and gives a misleading picture of root-zone moisture.
Fertilization Timing
Hold off on fertilizing for 3–4 weeks after transplanting. Newly divided roots are tender and vulnerable to fertilizer burn, even at moderate application rates. When you do begin fertilizing, use a low-nitrogen, phosphorus-forward formula (such as a 5-10-10 or similar) to encourage root development. Avoid high-nitrogen products until the plant is clearly established and putting on vigorous top growth.
Managing Wilting and Early Stress Signs
Some wilting in the first 3–7 days after transplanting is normal and not a cause for alarm. The root system is compromised temporarily, and the plant will wilt in the heat of the day even with adequate soil moisture. If wilting persists past day 10, or if leaves begin yellowing from the base upward (a sign of root rot rather than transplant stress), assess whether the plant was set too deep or the site is poorly drained.
Temporary shade—a piece of floating row cover propped up on stakes, or even an upturned basket for a day or two—can reduce transpiration stress during extreme heat. Remove shade as soon as temperatures moderate.
Propagation and Sharing: Getting the Most From Division
Division isn’t just maintenance—it’s free propagation. A single established hosta clump can yield 10–20 viable divisions at one time, each of which will reach mature flowering size within 2–3 growing seasons. The same logic applies to daylilies, coneflowers, and rudbeckia.
Storing and Transporting Divisions
If you can’t replant immediately—perhaps you’re dividing plants to share with a neighbor or taking them to a plant swap—store divisions correctly to preserve viability. Wrap root systems in damp burlap or newspaper and place in a shaded, cool location. Most hardy perennial divisions can survive 24–48 hours under these conditions without significant decline. Beyond 48 hours, pot them up in a moist growing medium rather than leaving them bare-root.
For shipping divisions by mail (common in online plant communities and seed swaps), bare-root division is the standard approach. Trim roots to 4–6 inches, wrap in slightly damp sphagnum moss, enclose in a plastic bag, and pack firmly to prevent movement. Ship early in the week to avoid weekend delivery delays.
When Divisions Are Worth Selling or Trading
Common perennials like daylilies, hostas, and phlox may seem low-value, but named cultivars—particularly newer introductions like Hosta ‘Sum and Substance’ or Hemerocallis ‘Strawberry Candy’—can retail for $15–$35 per pot at garden centers. Well-rooted divisions of these cultivars, offered at local plant swaps, farmers markets, or online through platforms like Facebook Marketplace, regularly sell for $5–$15 each and are consistently popular.
Common Mistakes and How to Avoid Them
Even experienced gardeners make these errors. Knowing them in advance is faster than learning from repeated failure.
Dividing at the Wrong Time of Year
The most costly mistake. Dividing spring bloomers in spring (while they’re actively growing toward their first flush of flowers) delays bloom by a full year and stresses the plant severely. Divide spring bloomers—like Primula, Pulmonaria, and Iberis—immediately after flowering, not before. Divide fall bloomers in spring, not fall. The general rule: divide opposite the bloom season.
Making Divisions Too Small
A division with fewer than 3 healthy shoots struggles to maintain itself and is highly vulnerable to drought, competition, and disease during establishment. Err toward larger divisions, especially when replanting in difficult sites or in extreme climates. Very small “chip” divisions are best potted up and grown on in a nursery bed for one full season before transplanting to a permanent location.
Replanting the Central Crown
Many gardeners, reluctant to discard any portion of the plant, replant the old woody center of the clump. This portion rarely recovers vigorous flowering and often harbors crown rot pathogens. Compost it rather than replanting it. Focus all replanting effort on the healthy outer portions.
Skipping Crown Depth Calibration
In the rush to complete a project, it’s easy to drop plants in at approximately the right depth rather than precisely the right depth. Crown depth errors of even 1–2 inches can reduce flowering, invite rot, or cause heaving. Take the extra 60 seconds to confirm the crown is sitting correctly before backfilling.
Failing to Water Consistently After Transplanting
Division casualties typically occur not at transplanting but in week 2 or 3, when gardeners assume the plant has established and reduce watering frequency prematurely. Set a phone reminder to check soil moisture every other day for the first month. This single habit prevents the majority of post-division losses.
Special Cases: Challenging Perennials Worth Extra Attention
Peonies
Peonies are notoriously resentful of disturbance. Divide only when absolutely necessary—when a clump has been in place for 10+ years and flowering has declined noticeably—and do so only in early fall (September in most of the U.S.). Each division must contain at least 3–5 “eyes” (the reddish buds on the root crown) and should be replanted with eyes no more than 1–2 inches below the soil surface. Deeper planting is the single most common reason peonies fail to bloom. Expect reduced flowering for 1–2 seasons post-division.
Ornamental Grasses
Large ornamental grasses—miscanthus, pennisetum, panicum—develop dense, woody crowns that require a sharp spade, a handsaw, or even a reciprocating saw to divide. This is not an exaggeration; a mature 5-year-old miscanthus clump can be nearly impossible to divide with a fork alone. Cut back the foliage to 4–6 inches before attempting division for better visibility and maneuverability. Spring is the preferred window (when new growth is just emerging); fall division of ornamental grasses is riskier in cold climates because the new root system has little time to establish before frost.
Hostas
Hostas can be divided almost any time during the growing season, making them unusually forgiving. The clearest time is early spring, when “noses” (emerging shoots) are visible and 2–4 inches tall, making it easy to identify and separate individual crowns. Each division needs at least one nose and attached roots. Hostas divided in summer need extra moisture and temporary shade to prevent leaf scorch during establishment.
Bearded Iris
Divide bearded iris every 3–4 years—overcrowded clumps produce fewer blooms and are more susceptible to iris borer. The timing is specific: 4–6 weeks after flowering, typically July in Zones 5–7. Dig the clumps, wash them clean, and use pruners to separate individual rhizome fans, each with one or two leaf fans and a healthy rhizome at least 3 inches long. Trim leaf fans to 6 inches to reduce wind rock while roots establish. Replant the rhizomes partially exposed at the soil surface—iris need sun on their rhizomes to bloom well. In hot climates (Zones 8–9), plant in late August to September rather than midsummer.
Frequently Asked Questions
What is the best time of year for dividing transplanting perennials?
The best time depends on when the plant blooms. Divide summer- and fall-blooming perennials in early spring (March–April) before significant top growth occurs, or in early fall (September–October) at least 6 weeks before hard frost. Divide spring-blooming perennials immediately after they finish flowering. In the Southeast and Gulf Coast, fall division is generally preferred over spring due to intense summer heat. In the Desert Southwest, October and February are the ideal windows.
How do I know when a perennial needs to be divided?
The most reliable signs are: a dead or hollow center in the clump, a noticeable decline in bloom quantity or quality compared to 2–3 years ago, clumps that have spread to invade neighboring plants, and stems that have become weak or flopped despite adequate staking. Fast-spreading species like bee balm and rudbeckia benefit from division every 2–3 years even without obvious decline; slower growers like hostas can wait 5 years or more.
Can I divide perennials while they are blooming?
Dividing actively flowering perennials is strongly discouraged. The plant is directing maximum energy to flower and seed production, leaving little reserves for root regeneration. Division during bloom causes significant stress, often results in the loss of that year’s flowers, and reduces establishment success. If absolutely necessary, remove all flower buds and stems before dividing to redirect energy to root recovery.
How large should each division be?
Each division should contain a minimum of 3–5 healthy shoots and a substantial root system—roughly the size of a softball to a grapefruit for most perennials. Smaller divisions can survive but require more careful aftercare and take longer to reach flowering size. Very small chip divisions are best grown on in nursery pots for one full season before transplanting to a permanent bed. Larger divisions of 8–10 shoots transplant easily and often flower within the same season.
Should I fertilize after dividing and transplanting perennials?
Avoid fertilizing for the first 3–4 weeks after transplanting. Freshly cut roots are vulnerable to fertilizer burn, and high-nitrogen products will push top growth at the expense of root development. Once the transplant shows clear signs of new growth (typically 3–5 weeks post-division), apply a low-nitrogen, phosphorus-forward fertilizer such as a 5-10-10 formula at half the recommended rate. Resume normal fertilization the following growing season.
Moving Forward: Building a Division Schedule Into Your Garden Calendar
The gardeners who get the best results from perennial division are not necessarily the most skilled—they’re the most consistent. Building a simple division schedule into your gardening calendar transforms an ad-hoc task into a proactive practice.
A practical approach: walk your perennial beds each spring and fall with a notebook or your phone, flagging any clumps that show signs of overcrowding or decline. Note the plant species, location, and how long it’s been since it was last divided. At minimum, every bed should receive a systematic review every three years.
Keep a small section of your garden—even a 4×4-foot nursery bed—as a staging area for divisions that aren’t ready to go directly into the main display. Pot up divisions you plan to share or sell. Label everything with species, cultivar, and division date. This practice alone can save significant money on new plant purchases and reduces the all-too-common experience of losing a prized cultivar because no backup divisions were ever made.
The garden you have five years from now is largely determined by the maintenance decisions you make today. Division is not glamorous work—it involves getting dirty, making cuts, and occasionally losing a plant to poor timing or technique. But it’s one of the practices that separates a garden that merely exists from one that thrives. The biology is on your side: perennials want to be divided. Give them the chance.